Moto Empire Controls, Camera Views & Wheelie Tips
Controlling your motorcycle smoothly in Moto Empire comes down to coordinating throttle and modifier inputs on PC while managing your balance on straight roads and steep mountain bends. Whether you are trying to hold a two-second wheelie for a challenge payout or keeping your front tire planted at the Drag Strip, understanding the verified keyboard mechanics will save you from costly crashes. This page covers recorded PC riding inputs, wheelie balancing techniques, garage launch control, and map navigation.
Verified PC Riding Controls and Launch Control
In recorded PC gameplay, basic motorcycle handling relies on standard keyboard acceleration, braking, and modifier keys alongside interactive UI buttons for spawning and teleporting. The official game description also highlights realistic rider movement and first-person camera views for immersive highway and coastal riding. In addition to standard driving inputs, you can unlock specialized starting mechanics inside the tuning garage.
| Action / Feature | Verified PC Input or Method | Usage Notes |
|---|---|---|
| Accelerate / Throttle | Hold W | Used for normal forward riding and initiating wheelies. |
| Initiate Wheelie | Hold W + Press Shift | Lifts the front wheel while accelerating on PC. |
| Balance Wheelie | Release and pulse W | Modulate throttle while airborne to avoid flipping backward or dropping early. |
| Launch Control Start | Hold Brake + Full Throttle at a stop, then release Brake | Requires purchasing and equipping the Launch Control modification in the garage first. |
| Map Route & Teleport | Click a hub to set route, or click a dot to teleport | Accessed through the Shops / Races / Map interface. |
Pay special attention to the Launch Control instruction shown in the Modifications menu: you must purchase that upgrade on your current motorcycle before the brake-and-throttle launch sequence functions. When you are competing at the Drag Strip without desiring a wheelie, focus on keeping your wheels down for a controlled start off the countdown.
How to Do a Wheelie and Keep Your Balance
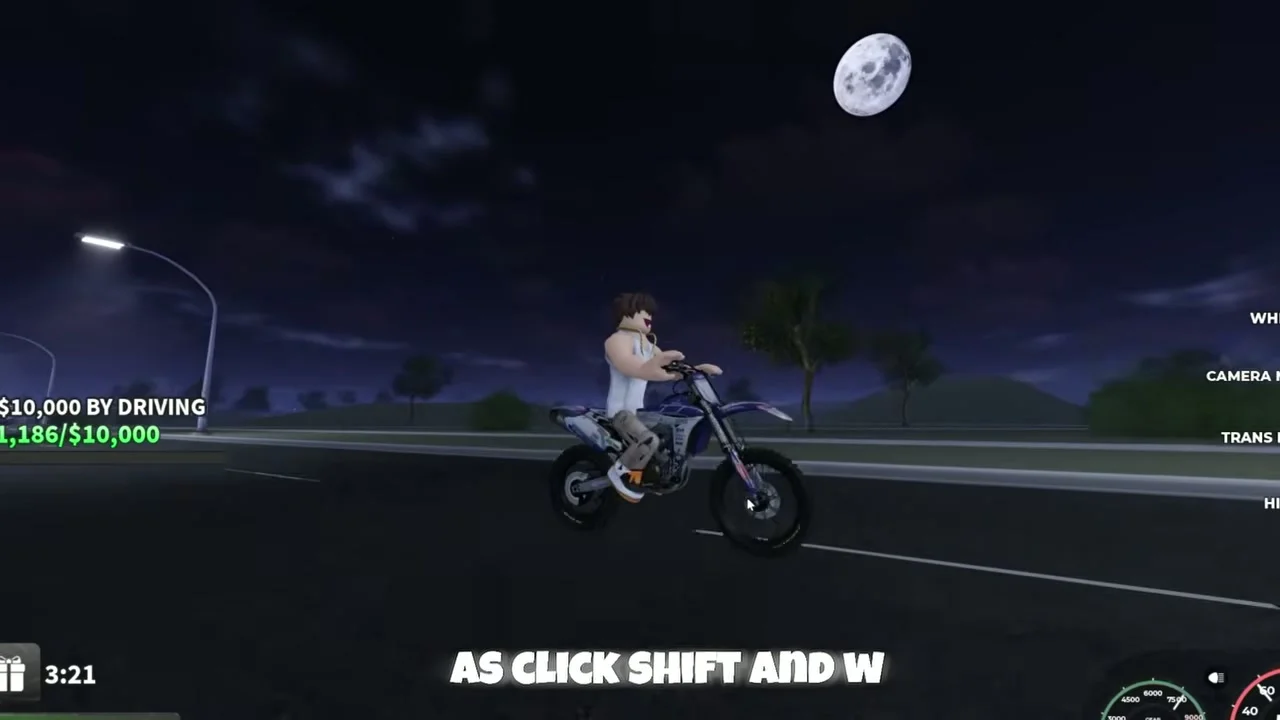
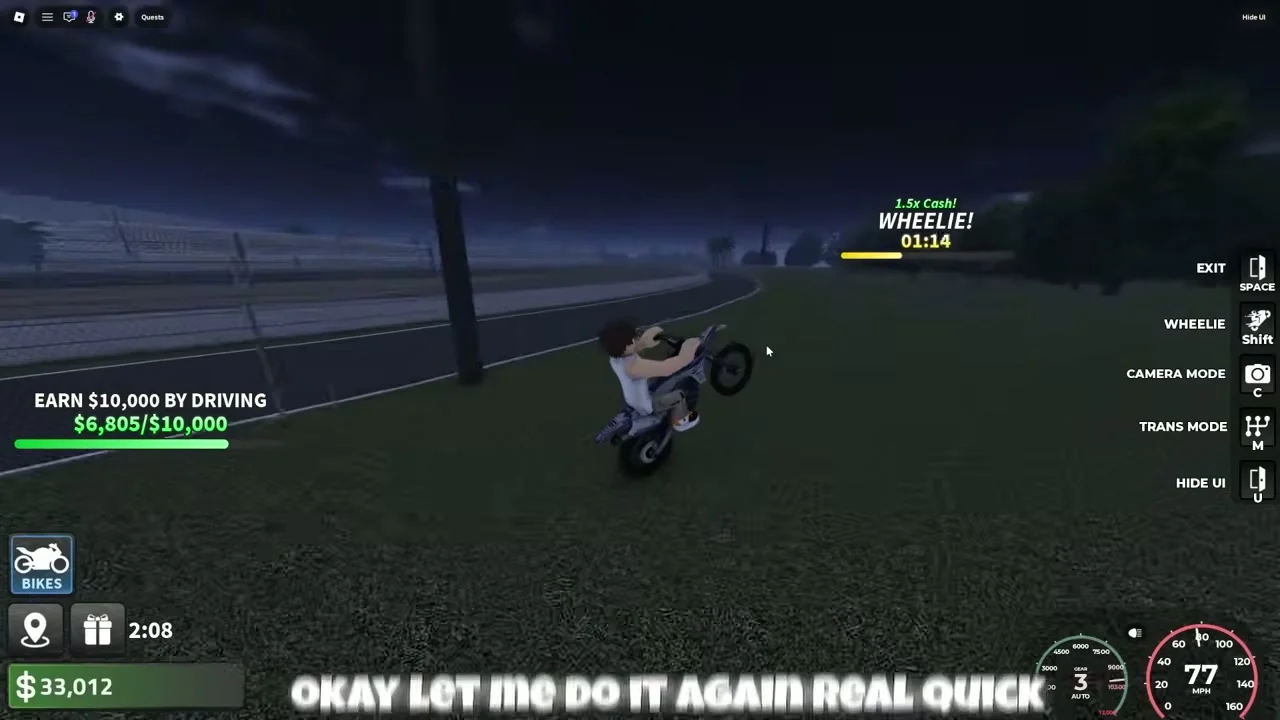
Learning how to wheelie is essential for clearing timed wheelie challenges and enjoying open highway stretches. Based on primary PC gameplay recordings, you lift the front tire by holding down W to accelerate and pressing Shift. Once the front end rises, an on-screen counter begins tracking your wheelie score for the current attempt.
- Line your motorcycle up on a wide, straight road with clear visibility ahead.
- Hold W to build forward momentum, then press Shift to bring the front wheel up into a wheelie.
- As the bike tips back, briefly release and lightly pulse the W key rather than holding full throttle nonstop.
- Steer gently to avoid roadside barriers, as colliding with a wall or obstacle immediately ends your wheelie attempt.
Notice that the numbers ticking up during your stunt represent your wheelie score rather than minutes elapsed. The Performance category also shows a Wheelie Setup in its sprocket options. Check its current description and cost before experimenting; no universal best wheelie setup has been verified.
Best Places to Practice Riding and Cornering
With the game map expanded to three times its earlier size and featuring highways, coastal roads, cities, and mountain passes, picking the right practice zone makes learning much less frustrating. For wheelie practice and top-speed runs, stick to long, straight highway sections where you have plenty of room to pulse the throttle without clipping barriers. In recorded gameplay, hitting a median barrier immediately terminates a high-scoring wheelie run.
When you want to practice braking and cornering, teleport to the Mountain Race start pad and launch a solo run. The mountain course winds down steep terrain with tight bends and checkpoint markers, rewarding riders who brake before entering downhill curves rather than carrying full highway speed into the guardrails.
Respawning Your Bike and Navigating the Map UI
Whenever a crash separates you from your motorcycle or leaves you facing the wrong way outside a race hub, use the on-screen Spawn Bike interface to bring your current ride back underneath you. You also need to spawn and physically ride your chosen motorcycle into the tuning garage or onto a race start pad for those menus to register your vehicle.
To cut down on dead travel time between events, open the map screen where the top bar displays Shops, Races, and Map tabs. Following the on-screen instruction, you can click a hub icon to set a driving route on your screen or click directly on a location dot to teleport there immediately. If a severe collision ever drops your avatar underneath the map geometry, use the Roblox menu respawn option first and then spawn your motorcycle again on solid road.
Platform Notes and Unverified Input Layouts
All driving and wheelie inputs documented in this guide come directly from verified PC keyboard gameplay and English interface prompts. Exact touchscreen button layouts for mobile devices and button mappings for console controllers have not been verified in primary footage. If you play on mobile or controller, check the on-screen buttons when spawning your bike and open the Shop, Map, and Garage tabs using the standard HUD icons.