Moto Empire Bike Upgrades, ECU Tuning & Garage Guide
Ride your chosen motorcycle into the tuning garage to access Performance, Appearance, and Modifications. Check the active bike name, compare each upgrade preview, and buy prerequisite tiers before higher levels. This guide covers the recorded ECU presets, sprocket options, launch control and cosmetic menus; custom dyno ratios remain unverified.
How to Enter the Garage and Select the Right Bike
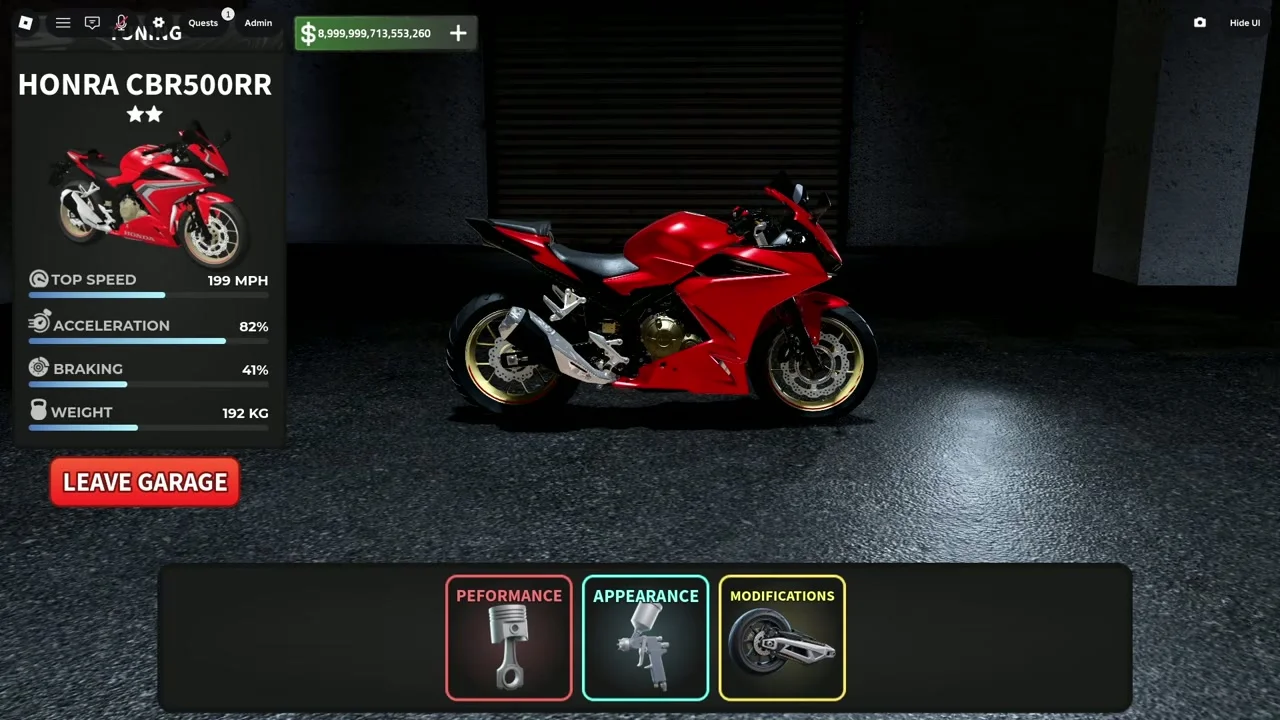
Before you spend a dollar on parts, make sure you are modifying the exact motorcycle you intend to keep and race. In Moto Empire, you must spawn your desired owned motorcycle outside and ride it directly into the tuning garage bay. Once inside, the top of the garage interface displays the name of your currently active bike, such as HONRA CBR500RR in recorded November gameplay, alongside three primary category tabs: PERFORMANCE, APPEARANCE, and MODIFICATIONS.
If you realize you drove in on your starter bike instead of your newest dealership purchase, exit the garage, spawn the correct motorcycle from your inventory, and ride back inside. Check the active motorcycle name before applying a purchase. Transfer of parts or cosmetics between different motorcycles has not been verified.
Performance Upgrades: Weight Reduction, Brakes, Engine, and Exhaust
The official game description and recorded garage menus confirm several core mechanical upgrade paths, including engine, exhaust, brakes, and weight reduction. Inside the garage, sequential upgrades lock higher tiers until you purchase the prerequisite earlier levels. Improving your engine and exhaust boosts overall power, while upgrading brake tiers becomes vital when you need to slow down rapidly for steep downhill turns on the Mountain Race course.
The November garage footage shows a progression of weight-reduction parts, including the items below. Read the live stat preview and costs before buying; the list is a recorded sample rather than a complete current catalog:
- Light Battery
- Lightweight Seat
- Lightweight Wheels
- Carbon Fairings
- Race Frame
ECU Tiers and RPM Response Presets
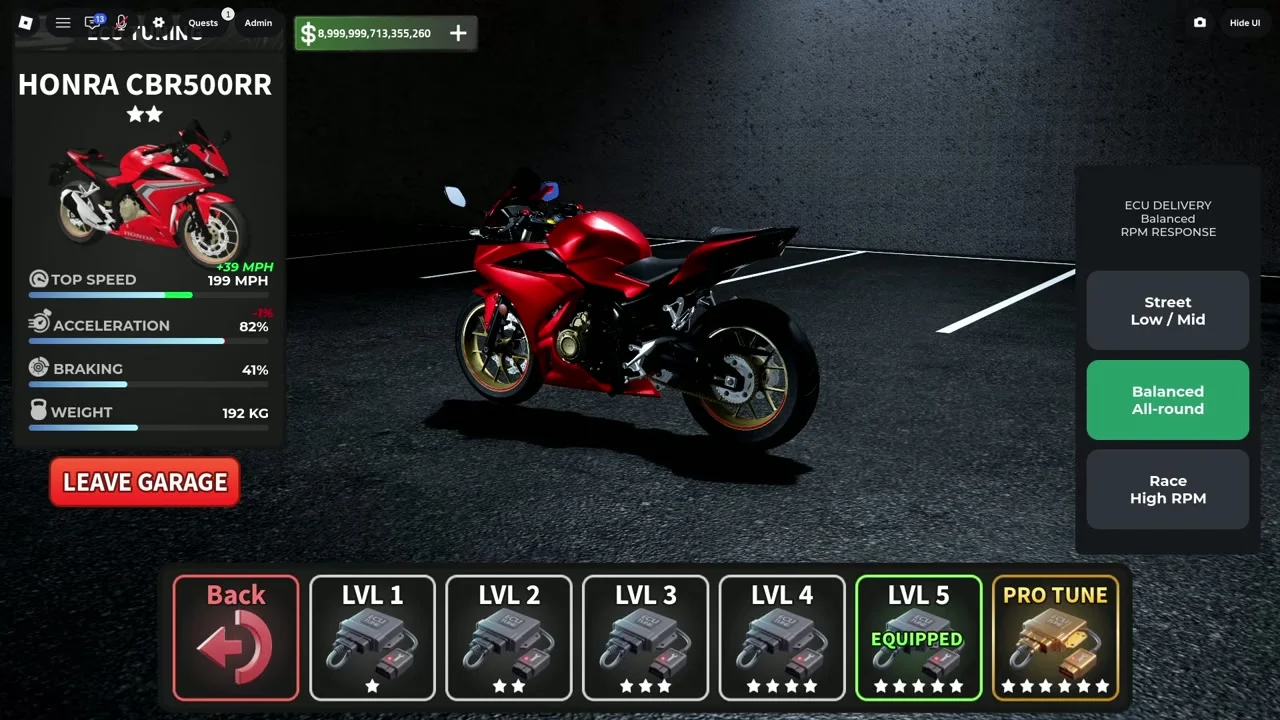
The ECU menu combines tiered level unlocks with selectable engine response behavior. Recorded garage screens show ECU performance tiers progressing from LVL1 through LVL5, followed by a top-end PRO TUNE option, with later levels remaining locked until you buy the preceding tiers. Once you equip higher ECU levels, you can also inspect the RPM response menu to tailor how your powerband behaves.
| ECU RPM Response Preset | Tuning Focus | Practical Application Advice |
|---|---|---|
| Street Low/Mid | Low to mid-range RPM power delivery | Compare this option on a route with slower corners; its effect on wheelies has not been tested here. |
| Balanced All-round | Even response across the RPM range | Use as a comparison point when evaluating the other available presets. |
| Race High RPM | Top-end high RPM power focus | Compare on a sustained high-speed route; the label alone does not establish the fastest setting. |
Do not assume that the Race High RPM preset is automatically superior for every single track or riding style. Read the current response descriptions on your screen and test one setting at a time on your favorite race route to see whether low-end punch or top-end power suits your bike better.
Launch Control and Performance Sprocket Setups
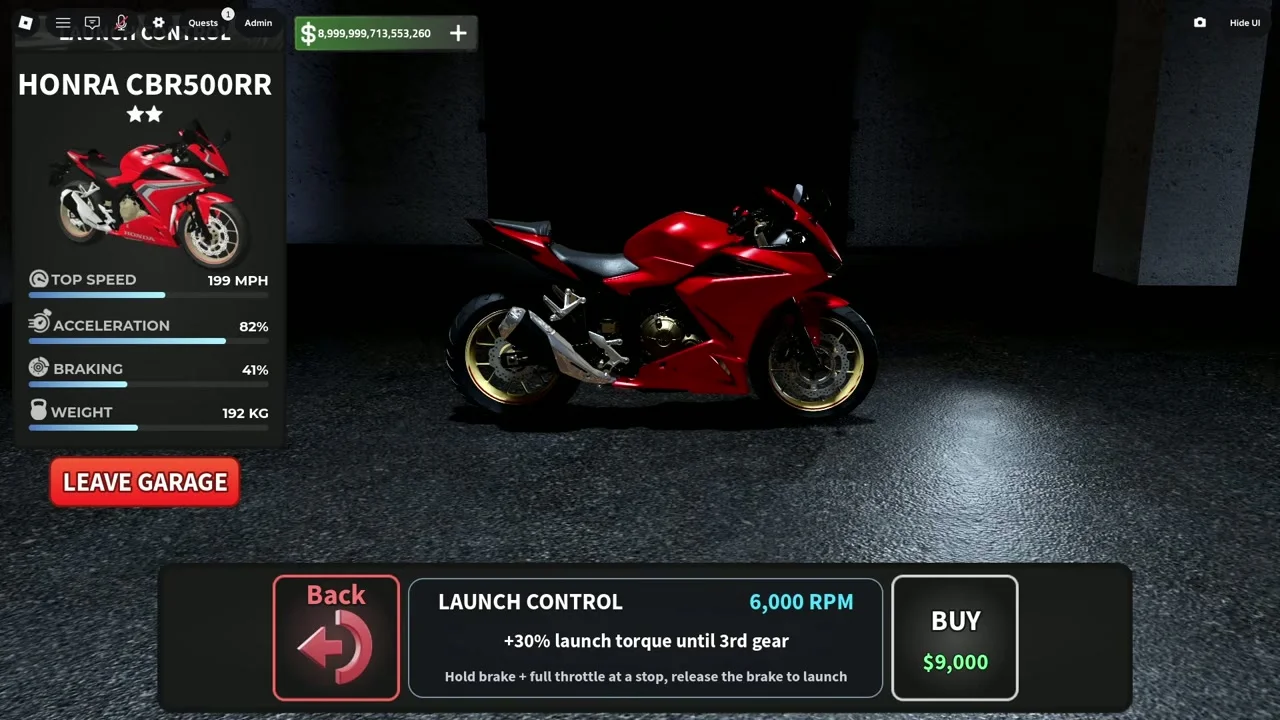
The MODIFICATIONS tab contains Launch Control. Sprocket setups are shown within the Performance options in the same recording. The Launch Control panel explains its exact operation on screen: hold brake plus full throttle at a stop, then release the brake to launch. Keep in mind that Launch Control requires an in-game cash purchase per bike before it activates, and specific RPM, launch torque percentage, and dollar costs shown in videos belong only to the specific motorcycle recorded.
The sprocket menu lets you adapt your gearing style across three named configurations that unlock via prerequisites: Street Setup, Wheelie Setup, and Highway Setup. If you are struggling to complete wheelie tasks, unlocking the Wheelie Setup provides a purpose-built gearing option, whereas the Highway Setup caters to long-distance speed runs.
Appearance Customizations: Paint, Plates, Stickers, and Flames
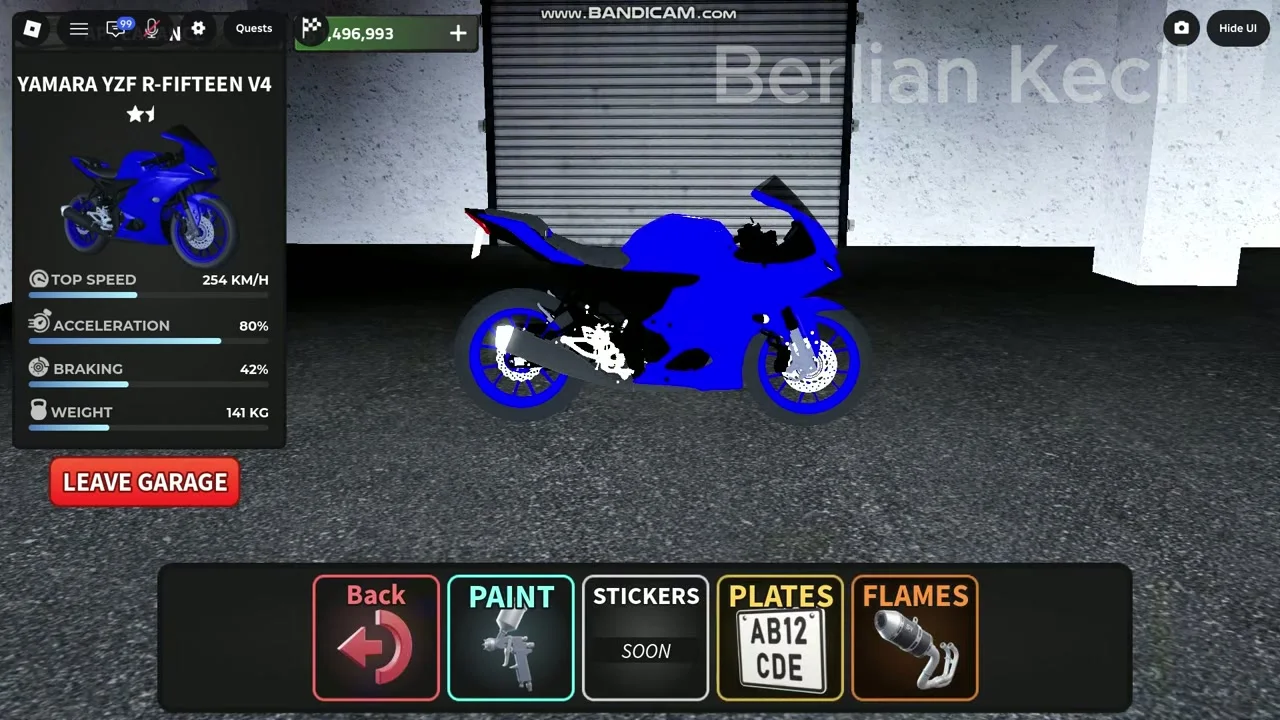
In the latest recorded November 11 build, the APPEARANCE category expands into four sub-menus: PAINT, STICKERS, PLATES, and FLAMES. Depending on the version and selected motorcycle, the Paint studio provides tabs for PRIMARY, SECONDARY, DETAIL, and RIMS, allowing combinations like a blue fairing body with red rims. Clicking colors previews the look on your bike inside the bay, so always check the actual purchase cost and apply button label before confirming, as previewing alone does not mean an item is owned.
The Plates menu reflects the official update addition of customizable license plates. Inside the Registration panel, you can choose between UK, EU, US, Custom, and Random formats, adjust the editable regional fields, select Standard or Premium plate styles, and press the apply button. Remember that visual customizations are completely optional for core progression, and selecting certain effects like exhaust Flames can prompt a Robux game pass window rather than a standard cash purchase.
Dyno and Gear Ratios: Settings Still to Confirm
The current official Moto Empire description confirms that Dyno + Gear Ratios are now part of the game alongside the expanded map and new races, and INSANEDYNO appears in the same update-era footage. However, exact dyno screen layouts and verified custom gear-ratio slider numbers for individual motorcycles have not been verified in the source material reviewed for this guide. Until verified screen data is available for individual bike ratios, avoid relying on guesswork tuning charts and stick to testing the verified ECU response presets and sprocket setups one change at a time.